How to Prepare Your Home for Painting
Painting is a powerful and transformative way to revitalize the interior and exterior of your home. Whether done by a professional or by yourself, new paint can turn walls into canvases that tell stories and evoke emotions.
The first step is to prepare the room to ensure a professional-looking result. Ideally, move all furniture to the center and cover it with drop cloths to protect it from excess splatter. Contact Home Painting Company Lake Orion now!
If you’re planning a home painting project, it’s important to consider the steps leading to your beautiful new paint job. The right preparation will help your painting project go more smoothly and ensure that you get a great, lasting finish.
One of the first things you should do before a painting project starts is to clear out any rooms that will be painted. This will let your painters do their work more easily and protect your belongings from dust and drips. It’s also a good idea to take down curtains and other window treatments before the painting begins so that your painters can do their work without worrying about them getting in the way.
It’s also a good idea to remove any furniture from the room that is going to be painted and move it to another area or put it in storage for the duration of the project. If you have any breakable items in the room to be painted, make sure to move them or cover them with drop sheets and tape. If you have a lot of clutter in a room, it may be helpful to vacuum or sweep the space before your painters arrive. This will ensure that there’s less dust kicked up during the painting process, which could end up sticking to your fresh paint.
It’s also a good idea to clean any areas that are going to be touched or handled by the painters, such as light switches and electrical outlets. This will help prevent them from smudging or leaving fingerprints on your freshly painted surfaces. You should also check and replace any rotting wood siding on your house before your painters start working on it. This is something that you will need to do yourself, but it’s a step that can make a big difference in the results of your paint project.
Walls
Home painting is a multifaceted solution that rejuvenates interior spaces and provides long-lasting protection for wall structures. It can improve the value of a property, increase living quality and boost health in a household.
While a fresh coat of paint can be an easy do-it-yourself project, it’s important to understand the proper preparation steps that are necessary for professional-looking results. Taking the time to do things properly will ensure a smooth, even finish that lasts longer and prevents costly repair issues down the road.
Before starting, it’s recommended to thoroughly wash walls using a cleaning solution that removes dust and dirt. It’s also a good idea to clean any molding or trim before beginning, and to remove any nails or screws from the surface of the walls before painting. This can make it easier to clean the surface and will prevent damage during the painting process.
After washing, it’s necessary to sand the surfaces of the walls to create an even texture before applying a primer. Primer helps the paint adhere to the surface and reduces the number of coats required for a full-coverage look. It’s recommended to use high-quality primer, as it contains ingredients that enhance surface adhesion and provides a professional-grade finish.
Once the primer is dry, it’s time to start painting. It’s recommended to work on one section at a time, using a brush to “cut in” along the edges and corners of the room and a roller for the majority of the surface area. It’s important to overlap each row by 30% to 40% as you go to avoid leaving lint behind on the surface of the paint.
When choosing a color, keep in mind that dark shades can take longer to dry than lighter colors. It’s recommended to allow for extra time in the schedule and to apply a second coat if needed.
Ceilings
Ceilings aren’t one-size-fits-all and can play a big part in the design of any room. They are also a great opportunity to make a statement with color or texture. Conventional ceilings are typically made from plaster or drywall, but they can be finished in any type of material that you prefer. They serve a variety of purposes, including enclosing spaces, preventing the passage of sound between rooms and hiding ductwork, pipes or other services.
Plaster ceilings may have complex and varied textures, while drywall ceilings tend to be smooth. If you have a plaster ceiling, PatchMaster Serving North York & Surrounding Areas can create a custom texture for it to suit your tastes. For example, pebble dash is a common plaster finish that looks like a bunch of small, round pebbles joined with mortar. Another popular option is a stippled finish, which is created by spraying a compound onto the ceiling that dries to create a subtle texture.
Other ceiling finishes include coving, which is a decorative molding that curves into walls or other surfaces. Tongue and groove wood ceilings can elongate the look of a room and be stained or painted to match any décor. For a more dramatic effect, curved beams and vaulted architectural details can be installed to accentuate a room’s space and style.
Some ceiling types require special care to keep them looking good. Water damage on ceilings can cause stains that are difficult to remove and will usually spread over time. Mold or mildew growth on the ceiling can also be a problem. It may appear as dark spots or patches and have a musty odor. These problems need to be repaired before they lead to more serious – and expensive – structural repairs.
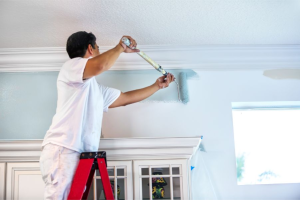
Trim
The trim (also known as molding or casing) around your windows and doors is an important part of your interior painting project. It hides nicks and chips, and it adds a clean, finished look to the walls where they meet. Trim also protects the wall from abrasions, spills, and structural damage. Regular painting of the trim keeps it looking fresh and new, hiding any nicks or dings that may occur over time.
Paint color options for your trim and baseboards are endless. You can match the walls or use a contrasting color to create an accent. Some homeowners choose to have their professional painters use a soft gray or white on the trim, which is a versatile option that works well with almost any wall color. Others prefer to have the trim and baseboards painted a darker hue, such as a black or dark gray. This can create a dramatic contrast and make the ceilings seem higher, which is perfect for rooms with low ceilings.
You can also use a more subtle sheen on your trim, such as satin or semi-gloss. These sheens are more durable than flat or eggshell paint and provide a subtle shine that highlights architectural details without overpowering the room.
Many older homes have intricate woodwork and trim that adds character and charm. Replacing this trim might require expensive materials and installation, whereas a fresh coat of paint is a cost-effective alternative that can enhance the style of your home and provide a fresh, updated look. However, it is important to consider the property’s history and current market trends before deciding to keep or replace the trim.
Wood
Woodwork like moldings and trim add a finishing touch to your home’s style. It also plays an important structural role, keeping walls and floors in good condition. Whether you’re looking to change the color of your woodwork or simply want to update its look, painting is an excellent option. There are many ways to paint woodwork, including brushing, spraying and stenciling. Whether you’re looking for a rustic, modern or classic style, paint can be used to create your ideal design.
Painting wood surfaces is also a great way to protect them. Over time, harsh sun rays can fade and degrade furniture and wooden surfaces. Paint shields wood from the sun’s harmful rays, helping it retain its vibrant colors for much longer.
Another benefit of painting is that it can make cleaning easier. Wood surfaces with paint on them tend to be less porous, which means that dirt and stains won’t soak in as easily. This makes it much easier to clean, which can save you a lot of hassle in the long run.
One last reason to consider painting your woodwork is that it can help you stay in line with your home’s overall aesthetic. For example, if your walls are painted a dark gray, it would be wise to use a lighter shade for the trim and fireplace millwork. This can ensure that the entire room has a cohesive look without overwhelming your home with too many different shades.
There are countless reasons why you should consider hiring a professional to paint your home. From simple to complex projects, the right painters can provide you with an amazing finished product that will transform your living spaces into an ambiance that perfectly reflects you and your family’s unique personality.